- Published on
Creating MQTT client code generator with AsyncAPI 2.x
- Intro to AsyncAPI Generator
- Community Templates
- Prerequisite before template development
- Creating first template
- Template tech stack
- Basic template structure
- Create highway to heaven
- Test the highway
- Install AsyncAPI CLI
- Use AsyncAPI CLI to test Template
- Let's finally create that client
- Create some real working client code
- Create some test code that uses the client
- Update template with working client code
- Setup script that runs test code
- This time we can really start templating
- Adding first parameters config
- Side small talk about React
- Small refactoring
- Templating class
- Creating first component - templating functions
- Check if the template works
- Final words
tl;dr
if ('I only want to generate models from my schemas){
  return "https://www.asyncapi.com/tools/modelina"
} else {
  return "https://www.asyncapi.com/tools/generator"
}
This article goes with the else option.
Intro to AsyncAPI Generator
AsyncAPI Generator is a library that you need to use to generate apps, SDKs or docs. Generator itself is just a set of helpers and configurations. Generator do not have any logic about SDKs or other stuff that you'd like to generate. The part that defines what should be generated is what we call Template.
What the heck is this? Generator and Template?
Do you know Johannes Gutenberg and his printing press? not personally of course, he is dead...he died almost 600y ago. Gutenberg is not important in this story, but his printing press.


So Generator is like printing press. It helps you to print stuff at scale, but alone, it is useless. Printing press needs input, a Template and your AsyncAPI document.


In your AsyncAPI document you describe your application, its interface, its actions. In the Template you say what part of the document should be used for a specific print output. So basically when you feed Generator with your AsyncAPI document and the Template, in Template you specify where asyncapi.info.title() taken from AsyncAPI document should be rendered.
Community Templates
You do not have to create a Template to generate something out of your AsyncAPI document. There are many community maintained templates, but for sure many others are missing.
Sometimes you need to create your custom template, tailored for your use case, which is completely fine. Just please remember, maintaining a template together with the community makes maintainance easier and also helps other community members to save on development time.
Prerequisite before template development
As I explained earlier, all the fun makes sense when the generator gets the template and AsyncAPI document. Thus before you start writing the template, you definitely need some sample AsyncAPI document that you will test your template with.
The template that I develop as part of this article is based on the following example:
asyncapi: 2.6.0

info:
  title: Comments Service
  version: 1.0.0
  description: This service is in charge of processing all the events related to comments.

servers:
  dev:
    url: test.mosquitto.org
    protocol: mqtt

channels:
  comment/liked:
    description: Updates the likes count in the database when new like is noticed.
    publish:
      operationId: commentLiked
      message:
        description: Message that is being sent when a comment has been liked by someone.
        payload:
          $ref: '#/components/schemas/commentId'

# It is a very good practice to write your AsyncAPI document with reusability in heart from the start.
# Even if you have one schema, put it in components and assign a name to it.
components:
  schemas:
    commentId:
      type: object
      additionalProperties: false
      properties:
        commentId:
          type: string
I created asyncapi.yml document in new test/fixtures directory in my template project.
Creating first template
For the sake of this article I will create a template that will support MQTT protocol and generate a Python client.
I'm not a Python developer. This will actually be my first time I write some Python code, but I'm not worried, I'll try to get some inspiration from articles like this one and see if AI will be able to help a bit.
Why Python then and not my beloved JavaScript?
The noisy sound of people leaving the room because they've heard the author loves JavaScript!


I wanted to use Python as my lovely wife is learning it now, and I want to be able to mentor her on a long run.
Template tech stack
Template is a standalone project that is not part of the Generator library logic and its codebase. You can store a template code wherever you want.
AsyncAPI Generator is written in JavaScript.
Java people already left the room anyway, but now the rest, TypeScript lovers, left
Ok, now we have only people with strong character left... :)
AsyncAPI Generator is written in JavaScript and uses npm libraries to pass template logic through the generator. In other words, when you tell AsyncAPI Generator to use Template A, the generator basically does npm install of the template. Thanks to this approach templates can be stored anywhere, like package registries, remote repository or just a tarball file - basically whatever npm install supports now.
Basic template structure
I store all template code in folder called python-mqtt-client-template.
-
First I create a
package.jsonlike you see below:{ "name": "python-mqtt-client-template", "version": "0.0.1", "generator": { "renderer": "react", "apiVersion": "v1", "generator": ">=1.10.0 <2.0.0", "supportedProtocols": ["mqtt"] }, "dependencies": { "@asyncapi/generator-react-sdk": "^0.2.25" } }AsyncAPI Generator supports two ways of writing templates:
- Using Nunjucks templating language
- Using React
Don't use the first one. Every AsyncAPI Generator maintainer lost a lot of hair debugging Nunjucks templates. One day it will be deprecated.
Lets see what is there in the
package.json, guessing thatnameandversiondo not require intro:generatoris where I specify generator specific configuration.rendereris where I specify that the generator should push my template through react rendering engine,apiVersionis where I specify that I want to use in my template the latest and gratest Parser API for extracting information from AsyncAPI documents,generatoris where I specify what versions of generator is my template compatible with. I don't know if AsyncAPI Generator 2.0 will bring changes that will break my template. I want my template users to have good experience and get a nice human-readable message from the generator that my template is not compatible with certain version of the generator. Also theapiVersionwas introduced in the generator1.10.0so I know my template won't work with older version,supportedProtocolsis where I specify what protocols my template supports. Again purely developer experience related setting. I could leave that out, but no. I do not want user of my template to get undefined errors if they usekafkabut a nice human-readable info that my template is at the moment compatible only with themqttprotocol,
dependencies > @asyncapi/generator-react-sdkis where I specify what version of@asyncapi/generator-react-sdkshould be used. This package contains a set of useful components that you MUST use in your template.
-
Since there are dependencies added, I need them locally, so I run
npm install, -
Now I create
templatefolder where all my template code will be located
Create highway to heaven
Or to hell, if you are a developer that loves strongly typed languages but agile drawing machine drum picked you to work on the template with JavaScript.


Everything starts in index.js
import { File } from '@asyncapi/generator-react-sdk'

export default function ({ asyncapi }) {
  return <File name="client.py">{asyncapi.info().title()}</File>
}
First template file and you already see @asyncapi/generator-react-sdk dependency is a must have. Among other components, it contains a File component that you need to use to specify that given template file must return a phisical file.
Focus your eyes on { asyncapi.info().title() } as this is most important. Template files get access to many different goodies thanks to the generator, one of those is asyncapi that is not representing your AsyncAPI document 1:1 but it is an instance of the AsyncAPI Parser. The AsyncAPI Parser responsible for validating AsyncAPI documents and giving you an API that makes it much easier to extract information from AsyncAPI document.
In other words { asyncapi.info().title() } means that asyncapi contains a set of helper functions like info() that returns the Info object from an AsyncAPI document:
# ...(redacted for brevity)
info:
  title: Comments Service
  version: 1.0.0
  description: This service is in charge of processing all the events related to comments.
# ...(redacted for brevity)
And the title() helper let's you extract the title from the Info object.
Lets see if it will work and the template is valid.
Test the highway
AsyncAPI CLI is a terminal tool that integrates different AsyncAPI tools that allow you to do different things with your AsyncAPI documents, like validation, optimization, bunding and others.
You probably guessed already that AsyncAPI Generator is there too.
Install AsyncAPI CLI
Well, yes, this one is written in JavaScript as well. Like the source code is in TypeScript, but whatever, installation still requires you do run:
npm install -g @asyncapi/cli
But calm down, we know people that do not like JS, also can't imagine installing node and npm. AsyncAPI CLI is also published as binaries dedicated to different operating systems.
I'm Mac user so I like this one the most: brew install asyncapi.
For more options just check out the docs.
Use AsyncAPI CLI to test Template
tl;dr just run asyncapi generate fromTemplate test/fixtures/asyncapi.yml ./ --output test/project
asyncapi generate fromTemplateis the way to use AsyncAPI Generator in the CLI,test/fixtures/asyncapi.ymlis how you provide the AsyncAPI document to the generator. Can be URL if you want../since this article describes how to write template, I explain how to run generation from local template sources. I assume you callasyncapi generate fromTemplatefrom the directory where your template project is located,--output test/projectis how you specify the folder where code should be generated
In case all is good, success looks like below:
Generation in progress. Keep calm and wait a bit... done
Check out your shiny new generated files at test/project.
Looks the same on your side, right?


I can see client.js file in test/project directory and the only content is Comments Service.
Let's finally create that client
Nobody does it this way, like write template from scratch directly. At least I can't imagine doing it. My brain can't get on that level of abstraction.
Anyway, this is my article and we do it my way:
- Create some real working client code
- Create some test code that uses the client
- Update template with working client code
- Setup some script that will help you run this code quickly to test
- Start templating your code


Create some real working client code
I'm not a Pyton dev and to save my time to get some real working code I used ChatGPT for the first time. I could get some code with additional refactoring in just few minutes.
This is the module for the client I have in client.py file in the test/project:
import paho.mqtt.client as mqtt

mqttBroker = "test.mosquitto.org"

class CommentsServiceClient:
    def __init__(self):
        self.client = mqtt.Client()
        self.client.connect(mqttBroker)


    def sendCommentLiked(self, id):
        topic = "comment/liked"
        self.client.publish(topic, id)
I'm using here an MQTT client from Eclipse Paho project to connect to the MQTT broker. In this article I will not explain what MQTT is and its use case, instead, I send you to article about MQTT in IoT.
Instead of spinning my own broker instance, I'm using a public test instance of Eclipse Mosquitto broker.
You will have to install that Paho package with pip install paho-mqtt.
The idea is that if somebody wants to interact with my Comments Service they do it using my client module. Just create instance of the client like client = CommentsServiceClient() and then use client.sendCommentLiked function to publish messages that Comments Service is subscribed to.
This is what the purpose of the client is, right? User do not need the info about the server and topic name. User just needs a helper function with clear info about what data should be passed to it.
Create some test code that uses the client
Let me try it in action. I created test.py in test/project directory that looks like below:
from client import CommentsServiceClient
from random import randrange
import time

client = CommentsServiceClient()

id_length = 8
min_value = 10**(id_length-1)  # Minimum value with 8 digits (e.g., 10000000)
max_value = 10**id_length - 1  # Maximum value with 8 digits (e.g., 99999999)

while True:
    randomId = randrange(min_value, max_value + 1)
    client.sendCommentLiked(randomId)
    print("New like for comment " + str(randomId) + " sent to comment/liked")
    time.sleep(1)
The code focuses only on sending the message, no need for any configurations, all is provided by the client instance. Rest of the code is only focused on generating some random comment ID and then endlessly sending it to the broker.
After calling python test.py I see the following logs:
New like for comment 39097159 sent to comment/liked
New like for comment 13144095 sent to comment/liked
New like for comment 19962377 sent to comment/liked
New like for comment 10554318 sent to comment/liked
But how do I know it works? There are no errors comming from the broker. How can I be 100% sure that the message I'm sending is actually reaching the broker and potential consumers?


I need to emulate some consumer that will subscribe to comment/liked and will log information about received message. I could write another python script that subscribes to the topic, but that would complicate the article too much and better is just use some MQTT CLI, and best to do it through docker.
docker run hivemq/mqtt-cli sub -t comment/liked -h test.mosquitto.org
Nothing more is needed. CLI connects to broker and subscribes to comment/liked and I should see incomming comment IDs:
$ docker run hivemq/mqtt-cli sub -t comment/liked -h test.mosquitto.org
60982511
93401458
47315214
30191547
All the dots are connected:

Update template with working client code
This part is the simplest. I copy contents of my client.py and replace what I had in my index.js.
To be exact, I replace asyncapi.info().title() and result is:
import { File } from '@asyncapi/generator-react-sdk'

export default function ({ asyncapi }) {
  return (
    <File name="client.py">
      {`import paho.mqtt.client as mqtt

mqttBroker = "test.mosquitto.org"

class CommentsServiceClient:
    def __init__(self):
        self.client = mqtt.Client()
        self.client.connect(mqttBroker)


    def sendCommentLiked(self, id):
        topic = "comment/liked"
        self.client.publish(topic, id)`}
    </File>
  )
}
This is not all yet. There are hardcodes, right?
Setup script that runs test code
Last step before actuall template work. During template development I will go back and forth quite a lot, so it would be nice to have a script that I can run to use the client, if it is still working.
Let's laverage the fact that templates are Node.js projects and that we use package.json.
In package.json you can have scripts property that later you can invoke by calling npm run <yout_script>.
Before I show you my scripts, lets have a look at the current structure of the project:

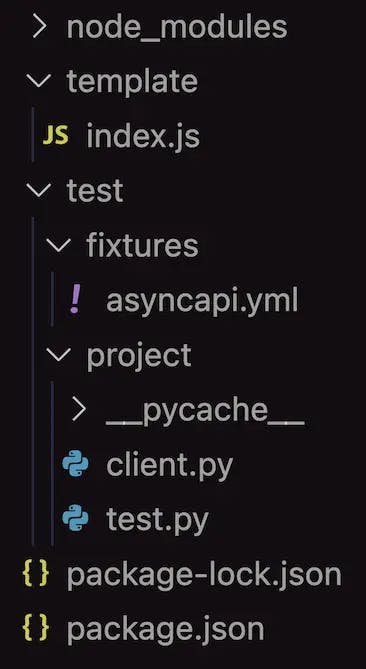
This are the scripts:
    "scripts": {
        "test:clean": "rimraf test/project/client.js",
        "test:generate": "asyncapi generate fromTemplate test/fixtures/asyncapi.yml ./ --output test/project --force-write",
        "test:start": "python test/project/test.py",
        "test": "npm run test:clean && npm run test:generate && npm run test:start"
    }
For clarity I created four scripts, to make it clear what each step of test script is doing.
You probably noticed something confusing, that is called
rimraf. This is pretty standard package Node.js folks use in npm scripts for cleanup. Therimrafpackage is used to perform deletion. You will need to add it as development dependency to the template like this:npm install rimraf --save-dev
test:cleanis needed because every time you run your test, you need to remove the old version of generatedclient.pytest:generateis responsible for calling AsyncAPI CLI to generate fresh version ofclient.pytest:startis for callin test python code that uses theclient.py
And the only thing I have to do in terminal to check if my generated code works is: npm test.
This time we can really start templating
The first part of the code that requires templating is:
mqttBroker = 'test.mosquitto.org'
The URL of the broker is not a static information, especially in professional environment where you have different instances of broker, for production and testing.
In AsyncAPI document you can provide a list of different servers, but when you generate client code, it is for one of servers only.
AsyncAPI Generator has cool feature that allows you to make template configurable in runtime. It is called parameters.
Adding first parameters config
In package.json under generator property (the one where I already specified that the template is created with react render engine), I add parameters object.
I use it to define a set of different parameters that user can pass to template in runtime and dynamically modify the output.
There is one special parameter that the generator supports and it is called server. It means that in the runtime I can say that "please generate code for me, but for server A" so in template code it is later much easier to extract server details from the AsyncAPI document.
Ok, bla bla bla. Give examples as for now it sounds misterious.
I added below to my package.json:
    "generator": {
        # ...(redacted for brevity)
        "parameters": {
            "server": {
              "description": "The server you want to use in the code.",
              "required": true
            }
        }
    }
"required": true makes the parameter mandatory and once user forgets about it, proper error message is yield
This means that later when I trigger generation with AsyncAPI CLI, I can pass to the generator information about server to be used in generated client:
--param server=dev
It simplifies template code a lot because I can then extract the URL of the server like this:
// "params" is a parametes object that generator injects into the template in runtime
// "asyncapi" is the instance of the parsed AsyncAPI document that I mentioned earlier in the article
asyncapi.servers().get(params.server).url()
So the template for now looks like:
import { File } from '@asyncapi/generator-react-sdk'

// notice that now the template not only gets the instance of parsed AsyncAPI document but also the parameters
export default function ({ asyncapi, params }) {
  return (
    <File name="client.py">
      {`import paho.mqtt.client as mqtt

mqttBroker = "${asyncapi.servers().get(params.server).url()}"

class CommentsServiceClient:
    def __init__(self):
        self.client = mqtt.Client()
        self.client.connect(mqttBroker)


    def sendCommentLiked(self, id):
        topic = "comment/liked"
        self.client.publish(topic, id)`}
    </File>
  )
}
If you follow the article the right way, you did npm test now and the test code created few chapters below works.
Side small talk about React
This is the moment where I feel like I need to share more about React before I throw you at code like this:
<Text newLines={2}>
  import paho.mqtt.client as mqtt
</Text>

<Text newLines={2}>
  mqttBroker = "{ asyncapi.servers().get(params.server).url() }"
</Text>

<Text newLines={2}>
  class { asyncapi.info().title().replaceAll(" ", "") }Client:
</Text>

<Text indent={2} newLines={2}>
  {`def __init__(self):
      self.client = mqtt.Client()
      self.client.connect(mqttBroker)`}
</Text>

<Text indent={2}>
  <TopicFunction
    channels={asyncapi.channels().filterByReceive()}
  />
</Text>
This is the moment backend developer says: "what the hell is it, HTML in a template for code generator?"
I hope this code do not look scary, but if it does, lemme sell it to you.
First of all do not be scared of word REACT. You do not have to learn a lot about it to create templates. You will not have to write code like this:
class ClassComponent extends React.Component {
  constructor(props) {
    super(props)
  }

  render() {
    // In `childrenContent` prop is stored `text wrapped by custom component\n\n`.
    // The content of the `children` prop is transformed to string and saved to the `childrenContent` prop.
    return this.props.childrenContent
  }
}
Above code scares the hell out of me too. You only need to know the generic concept of components in modern frontend frameworks. They exist to enable composition and reusability.
You need to remember that:
- Your component should return string
- You can reuse components and they can behave differently depending on the props you pass to them
Maybe I'm biased, but please look at below samples of template, written with classical templating enginge, Nunjucks, and React:
//Nunjucks

{% macro list(data, type = "-") %}
{% for item in data %}
{{type}} {{item}}
{% endfor %}
{% endmacro %}

{% from "partials/list.njk" import list %}
{{ list(["one", "two", "three"]) }}
//React

function List({ list = [], type = '-' }) {
  return list.map((item) => `${type} ${item}\n`)
}

// use `List` component in another component
export function SimpleList() {
  return <List list={['one', 'two', 'three']} />
}
Look into a mirror and answer that super important question every developer has to answer: "which code would you prefer to maintain in the future".
React toolset, community support, IDEs plugings. I can go on and on about it.
AsyncAPI Generator still supports Nunjucks, but yeah, don't go this way.
During development of this article, I had an error in code of my template and I got below super clear feedback what and where is wrong:
Generator Error: /Users/wookiee/sources/example-template/template/index.js: Unexpected token (41:67)

  39 |
  40 |       <Text newLines={1}>
> 41 |         mqttBroker = "{ asyncapi.servers().get(params.server).url( }"
     |                                                                    ^
  42 |       </Text>
  43 |
  44 |       <Text newLines={1}>
Good luck having the same experience with Nunjucks.


Small refactoring
In React the only disadvantage is that whatever component returns is a not formatted string. This means you need to care for new lines and indents.
Luckily the dependency I added at the beginning to my template have what I need. I import a Text component that I will use to wrap strings that need to be indent properly:
import { File, Text } from '@asyncapi/generator-react-sdk'
Maybe when you generate code you do not care that much on structure and proper indents, but yeah, I picked Python for that excercise,
     this is why
         indents
             are pretty
     important here
First I will refactor just part of this code:
// ...(redacted for brevity)
<File name="client.py">
  {`import paho.mqtt.client as mqtt

mqttBroker = "${asyncapi.servers().get(params.server).url()}"
// ...(redacted for brevity)
      `}
</File>
It doesn't look nice because of indents.
Paho module import import paho.mqtt.client as mqtt is static. I turn it into:
<Text newLines={2}>import paho.mqtt.client as mqtt</Text>
This way I assure that once this line of code is rendered in client.py file, it will add two extra new lines.
Next is broker URL:
mqttBroker = '${asyncapi.servers().get(params.server).url()}'
I turn it into:
<Text newLines={2}>mqttBroker = "{asyncapi.servers().get(params.server).url()}"</Text>
You can see a slight difference between how dynamic information is templated in a string (first version) with $ and inside components it is slightly different without $.
Templating class
The final part of the code that needs templating is:
class CommentsServiceClient:

  def __init__(self):
              self.client = mqtt.Client()
              self.client.connect(mqttBroker)

  def sendCommentLiked(self, id):
          topic = "comment/liked"
          self.client.publish(topic, id)
First I focus on class name and the __init__ function.
Design of my client assumes that there is always one class, no matter how many channels are there in the AsyncAPI document.
This means I need to pick the class name from the AsyncAPI document from the Info object, and not Channels.
Using the Parser API inside the template code it will be something like:
asyncapi.info().title()
This returns Comments Service string therefore in the template code I need to make sure there are no spaces, and there is Client suffix. Final code looks like this:
<Text newLines={2}>class {asyncapi.info().title().replaceAll(' ', '')}Client:</Text>
There is no templating needed in the __init__ function, there are only hardcoded information:
<Text indent={2} newLines={1}>
  {`def __init__(self):
      self.client = mqtt.Client()
      self.client.connect(mqttBroker)`}
</Text>
Creating first component - templating functions
Last part is how to make sure that the template, inside single class, renders as many functions as there are channels in AsyncAPI document.
In case of templating I will need to focus on function name that will be dynamic and based on the channel operation and the operationId value.
To extract more specific information from the AsyncAPI document this time I will write some helper function and also create a reusable component that I can use like this:
<TopicFunction channels={asyncapi.channels().filterByReceive()} />
Is component really necessary here? No, components are best when you know you need reusability. Just imagine use case where you need functions that not only send but also read from broker:
<TopicFunction
  channels={asyncapi.channels().filterByReceive()}
/>
<TopicFunction
  channels={asyncapi.channels().filterBySend()}
/>
I use component, because my article goal is to educate how to write a template, I want to show you how to write a component as well.
You can do it without using components, because as I explained earlier, it is all about strings, so just write a plain JavaScript function that returns string. This could be a potential pseudo code without component:
<Text newLines={2}>{getTopicFunctions()}</Text>
Now let me make sure that class CommentsServiceClient gets as many functions as there are channels in AsyncAPI document that contain publish operation.
Basically imagine there is another channel that describes usage of topic comment/unliked. So the generated code would look like:
import paho.mqtt.client as mqtt

mqttBroker = "test.mosquitto.org"

class CommentsServiceClient:

  def __init__(self):
              self.client = mqtt.Client()
              self.client.connect(mqttBroker)

  def sendCommentLiked(self, id):
          topic = "comment/liked"
          self.client.publish(topic, id)
  def sendCommentUnliked(self, id):
          topic = "comment/unliked"
          self.client.publish(topic, id)
I need to template sendCommentLiked and sendCommentUnliked that are dynamic basing on AsyncAPI document content.
My goal is to get working template code like:
<Text indent={2}>
  <TopicFunction channels={asyncapi.channels().filterByReceive()} />
</Text>
You can see that I want to have TopicFunction component that I could reuse in other scenarios to return topic-dedicated functions.
In my scenario, I specify that I want functions only for channels that Comments Service application is subscribed to.
In other words, I only want send functions.
Recommended path is to put reusable components outside template directory in a new directory called components, surprise surprise.
I end up with code in components/TopicFunction.js that looks like this:
/*
 * This component returns a blok of functions that user can use to send messages to specific topic.
 * As input it requires a list of Channel models from the parsed AsyncAPI document
 */
export function TopicFunction({ channels }) {
  const topicsDetails = getTopics(channels)
  let functions = ''

  topicsDetails.forEach((t) => {
    functions += `def send${t.name}(self, id):
        topic = "${t.topic}"
        self.client.publish(topic, id)\n`
  })

  return functions
}
Not that scarry right? component is just another lovely JavaScript function.
I don't think there is much to explain here other than below:
{
  channels
}
This component argument is a standard way of enabling component to accept custom props. You can see here the channels prop I showed in action in a component few paragraphs above:
<Text newLines={2}>
  <TopicVariable channels={asyncapi.channels().filterByReceive()} />
</Text>
The component must return a string and this is what it is doing.
You can now ask what is getTopics(channels) function responsible for.
/*
 * This function returns a list of objects, one for each channel with two properties, name and topic
 * name - holds information about the operationId provided in the AsyncAPI document
 * topic - holds information about the address of the topic
 *
 * As input it requires a list of Channel models from the parsed AsyncAPI document
 */
function getTopics(channels) {
  const channelsCanSendTo = channels
  let topicsDetails = []

  channelsCanSendTo.forEach((ch) => {
    const topic = {}
    const operationId = ch.operations().filterByReceive()[0].id()
    topic.name = operationId.charAt(0).toUpperCase() + operationId.slice(1)
    topic.topic = ch.address()

    topicsDetails.push(topic)
  })

  return topicsDetails
}
Channel in AsyncAPI document holds a lot of different information. It is good for clarity to have separate testable code where you extract specific information from the AsyncAPI docs.
I won't explain entire JavaScript code but focus on the part where data is extracted from single channel:
topic.topic = ch.address()
const operationId = ch.operations().filterByReceive()[0].id()
topic.name = operationId.charAt(0).toUpperCase() + operationId.slice(1)
Using Parser API I extract the channel address and record it as topic. In case of name of function I decided to use operationId of the operation associated with the channel.
You can see that I assume that there is just one operation. Which is completely fine prior 3.0 AsyncAPI spec and most pobably even in 3.0 people will still not have multiple receiving operations on the same channel, not in MQTT. To not complicate article and code more than needed, I just pick first operation from the list.
Final version of components/TopicVariable.js is:
/*
 * This component returns a blok of functions that user can use to send messages to specific topic.
 * As input it requires a list of Channel models from the parsed AsyncAPI document
 */
export function TopicFunction({ channels }) {
  const topicsDetails = getTopics(channels)
  let functions = ''

  topicsDetails.forEach((t) => {
    functions += `def send${t.name}(self, id):
        topic = "${t.topic}"
        self.client.publish(topic, id)\n`
  })

  return functions
}

/*
 * This function returns a list of objects, one for each channel with two properties, name and topic
 * name - holds information about the operationId provided in the AsyncAPI document
 * topic - holds information about the address of the topic
 *
 * As input it requires a list of Channel models from the parsed AsyncAPI document
 */
function getTopics(channels) {
  const channelsCanSendTo = channels
  let topicsDetails = []

  channelsCanSendTo.forEach((ch) => {
    const topic = {}
    const operationId = ch.operations().filterByReceive()[0].id()
    topic.name = operationId.charAt(0).toUpperCase() + operationId.slice(1)
    topic.topic = ch.address()

    topicsDetails.push(topic)
  })

  return topicsDetails
}
And now, in my template, in index.js I can import the component and this is how final code looks like, readable and testable:
import { File, Text } from '@asyncapi/generator-react-sdk'
import { TopicFunction } from '../components/TopicFunction'

export default function ({ asyncapi, params }) {
  return (
    <File name="client.py">
      <Text newLines={2}>import paho.mqtt.client as mqtt</Text>

      <Text newLines={2}>mqttBroker = "{asyncapi.servers().get(params.server).url()}"</Text>

      <Text newLines={2}>class {asyncapi.info().title().replaceAll(' ', '')}Client:</Text>

      <Text indent={2} newLines={2}>
        {`def __init__(self):
            self.client = mqtt.Client()
            self.client.connect(mqttBroker)`}
      </Text>

      <Text indent={2}>
        <TopicFunction channels={asyncapi.channels().filterByReceive()} />
      </Text>
    </File>
  )
}
If you follow the article the right way, you did npm test now and the test code created few chapters above works. At least it should :)
Check if the template works
Best way to check is to modify AsyncAPI document. I add another channel called comment/unliked because the user of the client might not only want to send message that there is a new comment but that someone unliked a comment.
asyncapi: 2.6.0

info:
  title: Comments Service
  version: 1.0.0
  description: This service is in charge of processing all the events related to comments.

servers:
  dev:
    url: test.mosquitto.org
    protocol: mqtt

channels:
  comment/liked:
    description: Updates the likes count in the database when new like is noticed.
    publish:
      operationId: commentLiked
      message:
        description: Message that is being sent when a comment has been liked by someone.
        payload:
          $ref: '#/components/schemas/commentId'

  comment/unliked:
    description: Updates the likes count in the database when comment is unliked.
    publish:
      operationId: commentUnliked
      message:
        description: Message that is being sent when a comment has been unliked by someone.
        payload:
          $ref: '#/components/schemas/commentId'

components:
  schemas:
    commentId:
      type: object
      additionalProperties: false
      properties:
        commentId:
          type: string
Now, if everything goes well, running npm test will still work. I just need to extend the test scrip, to test two functions and not one:
client.sendCommentLiked(randomId)
print("New like for comment " + str(randomId) + " sent to comment/liked")
client.sendCommentUnliked(randomId)
print("Comment " + str(randomId) + " unliked info sent to comment/unliked")
Works perfect:
New like for comment 84641472 sent to comment/liked
Comment 84641472 unliked info sent to comment/unliked
New like for comment 73287785 sent to comment/liked
Comment 73287785 unliked info sent to comment/unliked
New like for comment 44391365 sent to comment/liked
Comment 44391365 unliked info sent to comment/unliked
When I connect to comment/unlike I only get messages with commentId when unlike took place
docker run hivemq/mqtt-cli sub -t comment/unliked -h test.mosquitto.org

# output
84641472
73287785
44391365
Final words
There could be a lot of things improved in the template that I presented to you, tests added, even the test code that I have there could also be generated.
That would be too much for a already-long article.
The code of the template that I created while writing this article is available under my GitHub profile.
These are the main resources you should follow when learning about AsyncAPI generator and template development:
I hope you enjoyed a thinking process that I follwed while writing this article and creating actually my first template with support for AsyncAPI Parser 2.0 with a brand new Parser API.